Japanese woodblock printing
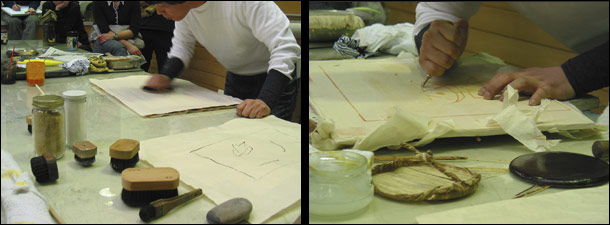
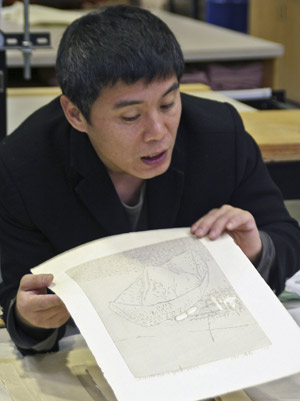
A few days ago, Tae-Huk Kim, our artist-in-residence from Korea, gave us an excellent demonstration of traditional Japanese woodblock printing. This is the technique he uses for making his contemporary woodcuts.
Several woodblocks are made, usually one for each colour, so registration of all these is critical. Kim begins with the first block that has been cut with the desired image plus the registration marks in two locations. He wets this block with a wide brush and water, then squeezes watercolour from a tube (any kind is fine) and some wheat paste, and brushes these around and up the cut relief areas. You can see his brushes in the left photo above, and also how the paper has been laid over the inked block, and Kim is rubbing the back vigorously with a baren (the round disks in the right photo above). Thus he makes a print.
Now he takes a clean uncut woodblock, wets it, applies Japanese glue over it evenly and places the print on top. This he allows to dry for about 15 minutes, then rubs the paper off, leaving behind the printed image. This becomes a cutting guide for the next colour area and is repeated for consecutive colour blocks.
The cutting tool that Kim favors most of the time is a traditional Japanese blade with a wood handle – note in the right photo above how he holds this with his fist at an angle, pulling towards him as he cuts along the edge of both sides of a line. Some western style woodcutting tools with curved blades have been taken into use now primarily for cutting away the open areas that will not be printed, and these are pushed into the wood. Kim also demonstrates how the tools are sharpened using Japanese water stones.
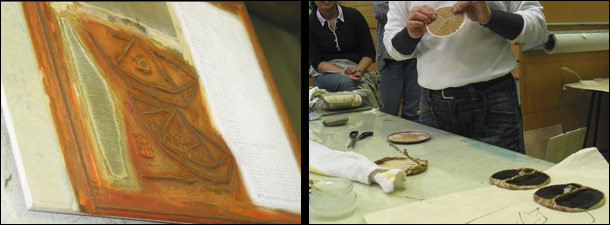
The left photo above shows one of the cut blocks. The raised or relief areas are what will be inked and printed. The white area on the right is a cut grid pattern inked white, while the center area and a border line are inked orange. On the left is a relief area that is left uninked as support for the paper. The registration marks are somewhere along one edge but can’t be seen in this photo.
The Japanese baren that is used for printing is a fascinating tool, consisting of up to 52 layers of lacquered Japanese paper on the outer disk. The inner disk, which Kim is holding in the right photo above, is made of tight rings of fine bamboo rope. The outer working surface is made of bamboo skin that is wrapped and tied to the disks, and is replaced as it wears out – an interesting demonstration of this too! It is time consuming to make the entire baren and costs about $500 each to buy! Kim says he sometimes makes them himself when time allows.
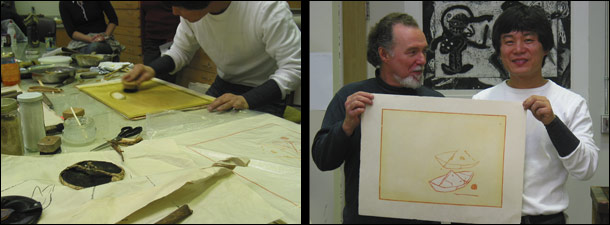
The second colour woodblock, once cut, is soaked with water and animal glue for a while. Then yellow watercolour and wheat paste is applied and brushed (see photo above left). This is printed over the first orange and white print, using the baren. There’s the two colour print in the right photo held up by Kim on the right and Wayne Eastcott, printmaking faculty, on the left.
Kim usually uses Japanese Kozo paper which he dampens and leaves in a plastic bag overnight before printing as well as between each colour printing.
I asked Kim if this method is the same as that used in making the famous Ukiyo-e Japanese woodblock prints produced between the 17th and the 19th century. Kim said it is very close but with the addition of some modern day tools, and adapted to his contemporary images.
Thank you, Kim, for this excellent presentation! I kept thinking about how easy this method of printmaking would be in a small home studio – no printing press and no toxic materials!
I’ve given fairly basic and minimal information here, so if you are interested in more information, check out the numerous links in Wikipedia’s article on Japanese woodblock prints, including an online demonstration, as well as the Handbook of Japanese Printmaking Technique.
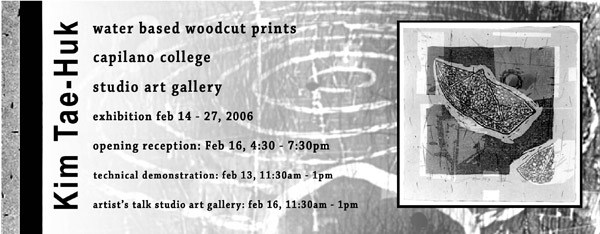
Oh, and don’t forget Kim’s exhibition opening tonight if you are in the area!
