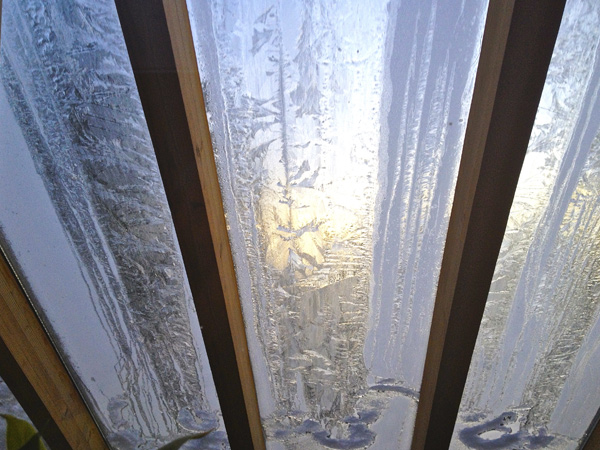
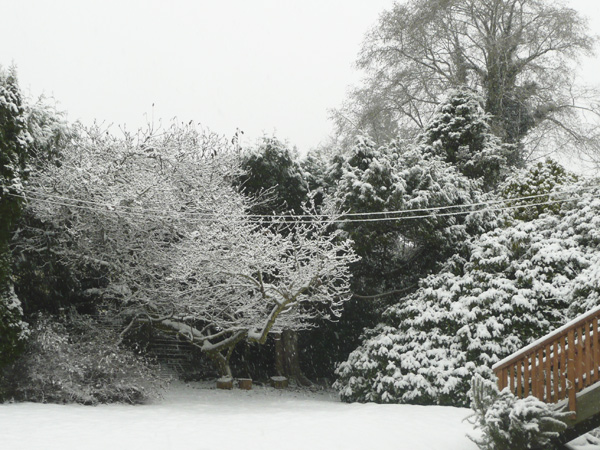
textures, patterns, shadows

PierTextureShadow1.jpg
   

PierTexturePattern.jpg
   

PierTextureShadow2.jpg
   

PierTextureCircle.jpg
   

I found interesting textures and patterns on the pier,
Such perfect evening light for photography,
A serendipitous addition to my image files for possible future use in my printmaking!

Posted by Marja-Leena on July 23, 2008 | Comments (12)

on the pier

BurrardDryDockPier.jpg
   

Being in the area yesterday evening, my husband and I sauntered over to see the 700 foot long Burrard Dry Dock Pier, just east of Lonsdale Quay in North Vancouver.
   

BurrardDryDockPier2.jpg
   

According to this History of the Pier,

The newly refurbished Burrard Dry Dock Pier and St. Roch Dock are a tribute to the City's shipbuilding history. The Burrard Dry Dock Pier and St. Roch Dock, which were built in 1940 for the wartime shipbuilding effort, once extended much further into Burrard Inlet. The piers, which were recently refurbished as part of the City's Pier Development project, officially opened on April 23, 2005.
   

CatesTugs.jpg
   

It's been sad to see our shipbuilding industry in decline and then to have much of this area handed over to developers of high end condominium towers and a hotel, with some space set aside for a future maritime museum. The pier area is the only completed public space yet, lying in front of the active construction holes and cranes. Very pleasant it is in how it's been refurbished incorporating the rail tracks of the original drydock and with many metal shipbuilding details. We found it a quiet and relaxing spot for watching the waterfront activity, though quiet on a Sunday except for the sudden actions of the tugboats (photo by him) coming and going as freighters began moving in with the tide just as we were leaving. I don't know why it's taken us over three years to go see this even though we are often in this area, maybe because it is so hidden behind the construction site.

We were quite inspired to take many photos in the golden evening light, so look out for more!

Posted by Marja-Leena on July 21, 2008 | Comments (2)

a scan test

shell1%40300.jpg

#1. Originally scanned at 300 dpi.

shell2%40600.jpg

#2. Originally scanned at 600 dpi.

My last post on scanning certainly piqued the interest of several readers! I look forward to seeing the results of your play, everyone! Barrett tried it out with his 'cheapo' (his word) scanner and was very disappointed.

I thought I would demonstrate a test I did for myself as much as for Barrett and any readers interested in more on this subject. I did two scans of the same object, enlarged by 200%, varying only the dpi (dots per inch), the first one at 300 dpi and the second one at 600 dpi.

I placed a handy object, a shell about 10 cm or 4 inches in length, on my open scanner and ran the scanner via PhotoShop. Each comes up as a .psd (PhotoShop) file, better than a Tiff for working with initially. The first scan came up at 3.29 MB in size and the second one at 52.6 MB.

For this test, I made no adjustments for colour, levels, contrast or anything else. On each image, I changed the resolution to 72 ppi, and the image width to 500 ppi. The file size on both then became 455K. Then I proceeded to 'save to the web' on each, choosing high quality, 79 (I could have gone higher but this is often the range I normally choose). The result?- both around 48K. The images automatically saved as jpegs. Then I uploaded them to the blog, eager to see if there's any difference. What do you think? Very subtle to my eyes!

So, the point of this very dry demonstration is to show that if your goal is just to put your scanned image on your blog, you do not have to scan at a huge resolution. I find around 300 is very good, and less would work, depending on your scanner quality.

If you plan to print your image, especially very large, then you may wish to use a very high resolution and magnification to get greater detail. For example, one artist friend of mine did a series of scans of leaves at the highest resolution (1200 dpi?) and after much work on the images, printed them something like 90 x 120 cm (3 ft by 4 ft). They were amazing!

For my own digital printmaking on more moderate paper sizes and with a high-end printer, I'm usually satisfied with less resolution, say at 300. Tests and trials are very much a part of the process for me to determine what works best for the image.

I'd love to hear from others who have a lot of scanning experience and have any tips to share, for I'm always learning!

Posted by Marja-Leena on July 19, 2008 | Comments (4)

3D scanning techniques

MacLeodLeaves1.jpg
   

I love how blogging can foster some interesting conversations and connections, and sometimes give food for more blogging material. A few weeks ago, British blogger Barrett Bonden of Works Well expressed interest in the equipment I use in my photography, then mentioned it in his article Beauty's hardware.

Then Barrett emailed me:

I'm really fascinated with your use of a scanner to image 3D objects. My scanner is a cheapo, has no such facility (the hinged lid would have crushed your wonderful onion skins, for instance) and I've always wanted something better. I Googled your scanner [Epson Perfection 4990 Photo] and could see it was superior (although the prices range from £125 to £500-plus and I'm rather hoping yours wasn't at the higher end). There was no indication, though, about how it handles 3D objects. I realise I'm trading on your skills as a professional here but I'd be very grateful if you could explain please.

My reply with some edits:

I had the same concerns about crushing objects. In my earlier experiments, I would lay a cloth, black or white or other over the objects, leaving the lid open of course. I've even used a shoebox. The most recent experiments like the onion skins were with nothing at all, still with the lid open and I was astounded that I'd get a black background! Now why didn't I think of that in the first place?!

I spent more money (though got it 'on sale') choosing the Epson Perfection 4990 Photo scanner because I needed the higher resolutions for my digital printmaking, and also because this scanner allows transparency and slide scanning, including odd sizes. My husband's collection of old extra large slides would not fit the slide scanner I used to have (which became obsolete technology, sigh). I haven't actually tried the slide scanning out much yet - I think that may become a retirement project. Plus my late father-in-law, a professional photographer left thousands of slides... if we have the energy to sort through these one day. We don't have a working slide projector that fits these, another story of obsolescence!

Barrett's response:

As simple as that! And there I was dreaming up all sorts of technoid-solutions. As a retired journalist I am horribly tempted to outscoop you on this - old, unpleasant habits die hard. I'm joking but you must blog it. Millions will profit and I'll be able, knowledgeably, to refer in future blogs to the Rathje 3D Scan.

Well (she chuckles), I don't know about my rights to the technique and millions profiting from it because I think the real pros have been doing this for a long time already. Serious photography is a more recent development and branch in my art practice, previously it was a tool for image capture for my photo-based printmaking such as photo-etching and then archival inkjet printing.

I prefer using the scanner to capture small objects because I think the results are far better than with the camera, at least in my hands, because I can choose very high resolutions (pixels). This allows me to enlarge or magnify the image to a great extent. This can give some wonderful and exciting surprises, such as shown in this my favourite post on scanning.

I thought of linking to some of my other 'object scans' but found far too many to choose from! If new readers (like you, Barrett) are so inclined and have a lot of time, check out my images in Photoworks on the side though not all the photos are scans. It's dawned on me that 'scanning' could have been another category here to improve the search!
   

MacLeodLeaves2.jpg
   

Regarding the images here... during my recent purging of old magazines, I had found these dried leaves in one of several Finnish magazines passed on to me years ago by a friend's Finnish mother who passed away a few months ago. That dear association as well as Barrett's question compelled me to save them digitally. The one up top is scanned with the lid down, the lower one with the lid up. I've even 'blown up' a section (below) so you can see the incredible detail possible, though much is lost in compressing for the web.

I should add that the quality of the scanning software provided by the scanner may be another important detail to look into when shopping around. As for photo-editing software, as a professional artist I use PhotoShop exclusively, but I would imagine similar things can be achieved with cheaper consumer level software if you are not planning on doing a lot of large printing. As a Mac user, i find Apple's iPhoto is good at a more basic level. I've not done any serious comparisons with other software, so please do your own research if you are shopping around. Best of luck in your search, Barrett, and thanks for the interesting conversation!
   

MacLeodLeaves2detail.jpg
   

Posted by Marja-Leena on July 16, 2008 | Comments (19)

summer in the backyard

A glimpse into some of the best in our backyard right now:
   

lotusflower.jpg

a type of trailing lotus plant, maybe this one, in the hanging basket,
   

beebalm08.jpg

a red bee balm or monarda,
   

ripeningredcurrants.jpg

and ripening red currants for a sweet tart taste of summer!
   

This July is a hot one, at least for me, who dislikes the heat and what it does to me. Ten months of the year we have rain, then two months of drought in the summer. Usually Vancouver's hottest period is mid-July to mid-August, but now I'm dreading that it will be all summer. Most of us in older homes do not have air-conditioning here, and we have still not installed my hoped for watering system in our large garden, so both garden and I are constantly hot and dry! I have so many blogposts I've wanted to write but I'm too hot and tired for words, so then I fall back on more garden photos to show off.

How is your summer, my friends?

Posted by Marja-Leena on July 12, 2008 | Comments (12)

dinosaur rock

   
dinosaur_rock.jpg
   

This cool find on the beach this morning is making me wonder about the geological journeys it has gone through before arriving on our shores.
   

Posted by Marja-Leena on July 7, 2008 | Comments (12)

Friday July 4th

tibouchina.jpg

I'm still very busy in the domestic front these days, alternating between gardening outdoors and purging indoors. My studio is looking less like a hurricane hit it, but I can't speak yet for the areas where the returning family has moved in, for it is hard to downsize!

All this work during a heat wave too! This morning we had a light shower but it's still humid and too warm in the house. Taking a break from work, I was sitting on our deck and spotted the first bloom on my young tibouchina plant - a deep velvety purple that this camera could not capture accurately - but here it is.

Wishing a happy Independence Day to my American family, friends and readers!

Posted by Marja-Leena on July 4, 2008 | Comments (7)